.

01242 964 444  CONTACT US

0Item(s)

You have no items in your shopping bag.

Product was successfully added to your shopping cart.

Beauty Blog

  • How to Minimise Hair Breakage

    Hair breakage is my nemesis. Years of monthly hair bleaching and constant styling using heated tools left my hair in a sorry state. Don’t get me wrong, I tried my best to take care of it, but the bleach eventually won the day. I had to surrender, reassess my hair colour choice and make sure I stuck to the best products to help bring my hair back to it’s former glory.

    Breakage happens when your hair is just too brittle; from hair colouring, from the elements, styling etc., that it snaps right off. If this sound like you, I beg you to consider the following precautionary steps to avoid the avoidable. Your hair is the only hair you’ve got and I don’t imagine many of us would consider shaving it off and starting again. Just saying!

    Tip 1: Go Sulphate-Free

    If you find that your hair is dry, try avoiding sulphates in your shampoo, as they will dry it out even more. Sulphates can be harsh on the body as they emulsify and pry dirt and grime from your skin and hair. Look for the word SLS (sodium lauryl sulphate) in the ingredient list. If you find it, put it down and step away. Your hair will thank you for it.

    Kérastase Aura Botanica Bain Shampoo 250ml is the ultimate sulphate free shampoo. Unlike most sulphate-free shampoos the sulphates have been replaced with natural origin agents to make sure your hair is truly nourished. Great for brittle hair types, obviously.

    Tip 2: Protein is your friend

    This one is good news for those of you who’ve jumped on the smashed avocado on toast train. Protein-rich foods help sustain hair growth and body. As with skin, hair health starts from within, so if you pay more attention to what you are feeding your body, you’ll see the results in your hair.

    Tip 3: Step away from the heat

    One of the biggest changes I’ve made has been to move away from my hair dryer a few days a week. All you need is a change in routine. I was stuck in a morning hair routine, which meant I was low on time so had to use my hairdryer. Thanks to a new set of products by Redken, I’ve been able to switch up my routine, and let my hair air dry. I just wash my hair in the evenings, towel dry a little and add in a bit of Redken No Blow Dry: Just Right Cream 150ml. I comb it through, part my hair as usual and just leave my hair to it. It’s been a revelation. My hair’s always dry by the morning, so I just brush through and add some curls in using a wand. I will always use Kérastase Resistance Ciment Thermique 150ml, a strengthening and anti-breakage milk for damaged hair straight after the Redken cream, to layer in the heat protection ready to use the wand in the morning.

    I can’t recommend this step enough. Even doing it once a week will make a difference.

    Tip 4: Reconsider your hair brush choice

    Hair brushes have a lot to answer for when it comes to breakage. You need to make sure that you’re using a brush that is kind to the hair and that actually removes tangles and knots rather than just snapping them off. Say hello to a Tangle Teezer to keep your hair in the best condition. They are great for detangling wet and dry hair without any tugs or pulls, keeping breakage to a minimum.

    Now there are obvious ways to stop hair breakage; such as not colouring your hair, never using straighteners or curling wands, but we all know that’s not feasible for 99% of us. Making a few simple changes, like I’ve mentioned above, will help save your hair and keep it in the best condition possible, without sacrificing style.

    What are your anti-breakage tips?

    xoxo

  • Common Cleansing Mistakes You’re Probably Making

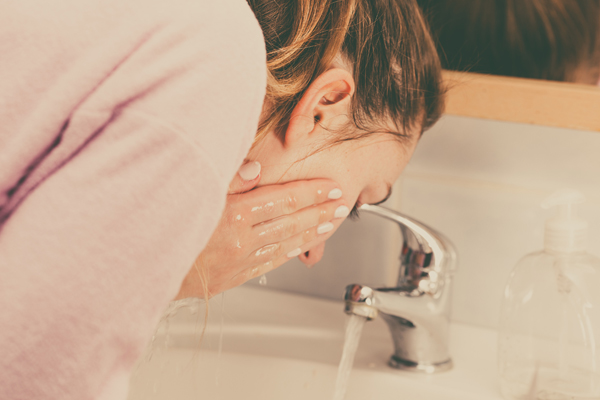
    Now I’m not trying to teach you to suck eggs here. I know that most of you have been here for a while and that you probably by now have your cleansing routine buttoned down. I’m so proud. Because it’s a routine though, we do it every day. It becomes mundane and we start to cut corners. We are busy people and bad habits can start to creep in. Let’s all take a moment to reassess and make sure we’ve got this down.

    Common Mistake No.1 - Your Water Temperature is Wrong

    We’re a little complacent when it comes to water temperature. The best tool for effective cleansing is something that costs you nothing: steam. Make sure your water is warm-to-hot (not too hot or you’ll dry out your skin). Use your favourite cleanser to cleanse your skin and then use a flannel to take the cleanser off, allowing a moment for it to rest on your face. The steam from the flannel will help your pores to open for a better cleanse. Although it’s tempting to skip this step, finish with a splash of cold water to calm your skin and close the pores. Plus, it’s a great way to wake you up in the morning!

    Common Mistake No.2. – Too Speedy

    Never be tempted to skip the second cleanse. Our daily lives can take a real toll on our skin, what with makeup and general dirt and grime. One cleanse just isn’t enough to rid your skin of all that and actually cleanse the skin. Yes, one cleanse is better than none, but if it’s worth doing it’s worth doing right no? Use a cleanser strong enough to cut through make up, such as Decleor Micellar Cleansing Oil, for your first cleanse, then ramp it up with a cleanser more targeted to your needs for your second cleanse.

    Common Mistake No.3 – You’re Using Too Many Products

    Less is more. You don’t need to exfoliate every day. Sometimes the simple routines are the best routines and it give your skin time to adjust.

    Common Mistake No 4. - Misunderstanding Your Skin’s Needs

    I see this most commonly in acne sufferers. Most find that the acne is topical and reoccurring in the same areas, such as the chin or forehead. They then of course reach for a medicated cleanser all over. Just stop. You’re just overwhelming the rest of your skin and drying it out. Only use the acne wash where it’s needed, and make sure to keep the rest of the face hydrated with a less intense cleanser. Break your skin down into ‘zones’ and treat each zone according to its concern.

    Are you guilty of any of these common mistakes? Not anymore!

    xoxo

  • How to remove your Gel Manicure

    Whoever invented the gel manicure was a genius. Two-plus weeks of chip free, perfectly shaped nails..yes please! Sadly though, they represent a slightly higher level of commitment than your average manicure. If you don’t remove them in the right way,  you could end up with damaged and weak nails. Fear not! I can help you understand the safe way to remove gel nails and make sure you can maintain healthy nails to keep on enjoying that gel look.

    Step 1: Nail file time. The grittier the better. Gentle just wont cut it. Think sand paper (just please don’t use actual sand paper). Start to buff off the first shiny layer of polish so that the nails look matte and scratched. Don’t be afraid to buff. Remember that there are several layers of gel between the file and your nail, so don’t be afraid of damaging your nail, that’s not going to happen.

    Step 2: Acetone baby. Get prepared with acetone, 10 cotton wool pads and 10 rough squares of foil. First,  soak a cotton wool pad in acetone, and I mean soak. Fold the cotton wool into a semi-circle and place on your fingernail, covering completely. Wrap over the cotton wool with the foil. Make sure it’s tight. Top tip – make sure the shiny side of the foil is in contact with the cotton wool. Carry on until you’ve completed the whole hand. I find it easier to complete one hand at a time, otherwise things can get tricky.

    After about 15 minutes, check to see how much you’re flaking. Some polish will flake right off. Others might require a little more encouragement. What you are looking for is for the gel polish to start lifting and rolling up in the corners. Once it looks like they are ready, grab an orange stick and push the polish off your nail-bed horizontally and gently. Be careful not to dig in on stubborn spots. If it’s not coming away easily, pop some more acetone on some cotton wool and re-wrap the nail. Repeat.

    At this stage, your nails will look dry, but don’t worry. It’s only temporary. After a round of nourishing cuticle oil, your nails will be gleaming and healthy.

    Once you’ve removed all the gel, I like to take a moment to wash my hands to get rid of any excess gel flakes. Then you can get on with a DIY manicure to get your nails back into shape. File your nails down slightly if you want to lose some length. Then my go-to product is the Nailtiques Formula 2 Kit. This contains everything you need to keep your nails healthy and ready for another gel manicure. Start by applying the Formula 2 polish. Apply 1 layer per day for 1 week before removing and starting again. This will give your nails the nourishment they need to stay healthy and strong. The kit also includes a cuticle oil known as Oil Therapy and Cuticle and Skin Gel. Use the oil daily on the cuticles just before bed and rub the gel into your nail-beds in the mornings. You nails will thank you for it, trust me.

    If you take one thing away from this post though, please for the sake of your nails, don't peel the gel off. EVER. I know it’s so tempting. It's occasionally satisfying, but it also can take off layers of your natural nail in the process. It’s not worth it. Yes it might save time, but it will cost you healthy nails. If you want to avoid the hassle, you can always book in with your salon who will remove them perfectly for you.

    So there you have it. How to remove your gel manicure the safe way. Give it a try and let me know how you get on.

    xoxo


Items 22 to 24 of 244 total