.

01242 964 444  CONTACT US

0Item(s)

You have no items in your shopping bag.

Product was successfully added to your shopping cart.

tips

  • Common Cleansing Mistakes You’re Probably Making

    Now I’m not trying to teach you to suck eggs here. I know that most of you have been here for a while and that you probably by now have your cleansing routine buttoned down. I’m so proud. Because it’s a routine though, we do it every day. It becomes mundane and we start to cut corners. We are busy people and bad habits can start to creep in. Let’s all take a moment to reassess and make sure we’ve got this down.

    Common Mistake No.1 - Your Water Temperature is Wrong

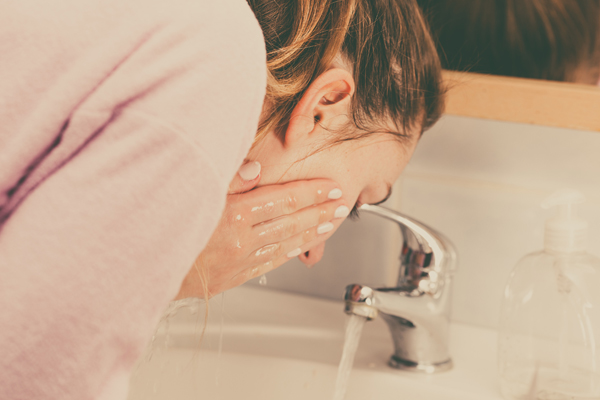
    We’re a little complacent when it comes to water temperature. The best tool for effective cleansing is something that costs you nothing: steam. Make sure your water is warm-to-hot (not too hot or you’ll dry out your skin). Use your favourite cleanser to cleanse your skin and then use a flannel to take the cleanser off, allowing a moment for it to rest on your face. The steam from the flannel will help your pores to open for a better cleanse. Although it’s tempting to skip this step, finish with a splash of cold water to calm your skin and close the pores. Plus, it’s a great way to wake you up in the morning!

    Common Mistake No.2. – Too Speedy

    Never be tempted to skip the second cleanse. Our daily lives can take a real toll on our skin, what with makeup and general dirt and grime. One cleanse just isn’t enough to rid your skin of all that and actually cleanse the skin. Yes, one cleanse is better than none, but if it’s worth doing it’s worth doing right no? Use a cleanser strong enough to cut through make up, such as Decleor Micellar Cleansing Oil, for your first cleanse, then ramp it up with a cleanser more targeted to your needs for your second cleanse.

    Common Mistake No.3 – You’re Using Too Many Products

    Less is more. You don’t need to exfoliate every day. Sometimes the simple routines are the best routines and it give your skin time to adjust.

    Common Mistake No 4. - Misunderstanding Your Skin’s Needs

    I see this most commonly in acne sufferers. Most find that the acne is topical and reoccurring in the same areas, such as the chin or forehead. They then of course reach for a medicated cleanser all over. Just stop. You’re just overwhelming the rest of your skin and drying it out. Only use the acne wash where it’s needed, and make sure to keep the rest of the face hydrated with a less intense cleanser. Break your skin down into ‘zones’ and treat each zone according to its concern.

    Are you guilty of any of these common mistakes? Not anymore!

    xoxo

  • How to remove your Gel Manicure

    Whoever invented the gel manicure was a genius. Two-plus weeks of chip free, perfectly shaped nails..yes please! Sadly though, they represent a slightly higher level of commitment than your average manicure. If you don’t remove them in the right way,  you could end up with damaged and weak nails. Fear not! I can help you understand the safe way to remove gel nails and make sure you can maintain healthy nails to keep on enjoying that gel look.

    Step 1: Nail file time. The grittier the better. Gentle just wont cut it. Think sand paper (just please don’t use actual sand paper). Start to buff off the first shiny layer of polish so that the nails look matte and scratched. Don’t be afraid to buff. Remember that there are several layers of gel between the file and your nail, so don’t be afraid of damaging your nail, that’s not going to happen.

    Step 2: Acetone baby. Get prepared with acetone, 10 cotton wool pads and 10 rough squares of foil. First,  soak a cotton wool pad in acetone, and I mean soak. Fold the cotton wool into a semi-circle and place on your fingernail, covering completely. Wrap over the cotton wool with the foil. Make sure it’s tight. Top tip – make sure the shiny side of the foil is in contact with the cotton wool. Carry on until you’ve completed the whole hand. I find it easier to complete one hand at a time, otherwise things can get tricky.

    After about 15 minutes, check to see how much you’re flaking. Some polish will flake right off. Others might require a little more encouragement. What you are looking for is for the gel polish to start lifting and rolling up in the corners. Once it looks like they are ready, grab an orange stick and push the polish off your nail-bed horizontally and gently. Be careful not to dig in on stubborn spots. If it’s not coming away easily, pop some more acetone on some cotton wool and re-wrap the nail. Repeat.

    At this stage, your nails will look dry, but don’t worry. It’s only temporary. After a round of nourishing cuticle oil, your nails will be gleaming and healthy.

    Once you’ve removed all the gel, I like to take a moment to wash my hands to get rid of any excess gel flakes. Then you can get on with a DIY manicure to get your nails back into shape. File your nails down slightly if you want to lose some length. Then my go-to product is the Nailtiques Formula 2 Kit. This contains everything you need to keep your nails healthy and ready for another gel manicure. Start by applying the Formula 2 polish. Apply 1 layer per day for 1 week before removing and starting again. This will give your nails the nourishment they need to stay healthy and strong. The kit also includes a cuticle oil known as Oil Therapy and Cuticle and Skin Gel. Use the oil daily on the cuticles just before bed and rub the gel into your nail-beds in the mornings. You nails will thank you for it, trust me.

    If you take one thing away from this post though, please for the sake of your nails, don't peel the gel off. EVER. I know it’s so tempting. It's occasionally satisfying, but it also can take off layers of your natural nail in the process. It’s not worth it. Yes it might save time, but it will cost you healthy nails. If you want to avoid the hassle, you can always book in with your salon who will remove them perfectly for you.

    So there you have it. How to remove your gel manicure the safe way. Give it a try and let me know how you get on.

    xoxo


  • The golden rules of fine hair

    You know and I know that no two hair types are the same. Each comes with its own set of issues and quirks but if you follow a few rules, you’ll find your day to day hair life will be a breeze.

    Let’s explore the golden rules of fine hair to start you off:

    1: Shampoo

    If you have fine hair then you will know this by now; fine hair gets greasy easily. Fine hair tends to be smoother and less porous than coarser hair types, so the oils sit visibly on top of the hair, appearing greasier. The secret to good looking fine hair isn’t how often you shampoo though…it’s where you shampoo that makes the difference. I would always suggest that with fine hair, you shampoo the top area where you feel it’s greasy and avoid the bottom half where it isn’t. Then do the opposite with your conditioner, to avoid a flat look.

    In terms of the amount of product you should use, this will depend on your desired look. If you’re after volume, use less conditioner, more shampoo. If you want a softer look…do the opposite. The rule is…the more conditioner you use, the softer your hair and the flatter. Simple.

    My top picks for shampoo and conditioner for fine hair have to be Redken Beach Envy Volume Texturizing Shampoo 300ml and Redken High Rise Volume Conditioner 250ml

    2: Cutting

    Fine hair tends to be a bit more sensitive to the way that it’s cut. With fine hair all the finer details show up when you get a cut. The key here is subtle layers. A good stylist will be aware of this and will suggest appropriate styles for your hair type. The key is good communication here. Let them know what’s worked for you and what hasn’t. Give them examples of the look you want to achieve, how long you’re willing to spend styling it and how you like to wear your hair day to day. The more information your stylist has, the more likely you are to walk away with a cut you love. Communication is key.

    3: Styling

    The secret here is with the type of products you go for. Finer hair types should opt for ‘hold’ product over ‘oil’ based products (oils, creams or serums). Oil based products will weigh your hair down and make it appear greasy.

    When I say hold products I’m talking salt sprays, dry shampoo, mousse, texturising mists. These won’t weigh your hair down. With fine hair – golden rule is use less of the greasy stuff and more of the sticky stuff. My favourites are L’oreal Professional Beach Waves Texturising Salt Spray 150ml and OSiS+ Refresh Dust Bodyfying Dry Shampoo 100ml

Items 7 to 9 of 140 total