.

01242 964 444  CONTACT US

0Item(s)

You have no items in your shopping bag.

Product was successfully added to your shopping cart.

tutorial

  • Skincare: How much product you should be using

    Sometimes it’s the most obvious questions that get overlooked. We spend so much of our time asking which products will most benefit our skin and when to use them, that very often we forget to ask the simplest thing; how much should I be using?

    So, if you’re confused whether ‘less’ really is ‘more’ or if you should be generous with your favourite products then this is the post for you. Let me break it down.

    Cleanser – This depends on your choice of cleanser and which cleanse you’re doing:

    Balm cleanser (used for first cleanse or make-up removal): a heaped teaspoon

    Cleansing milk (used for first cleanse or make-up removal): a heaped teaspoon or two pumps, depending on your applicator.

    Second cleanse or your morning cleanse – a level teaspoon or just one pump

    Toner

    Make sure you’re using a cotton pad. Dampen it with your toner until it’s ¾ wet. To make your product go further, use both sides of the pad.

    Eye cream

    The aim here is to cover your entire eye area, both below and over your eye. If you don’t struggle with a dry or overly ageing eye area, a small amount on the edge of your ring finger will be more than enough. Remember, you need not ‘rub’ in an eye cream. The heat from your fingers will do the work, so just pat the product in gently. If your eyes are dry or showing signs of ageing, then you may want slightly more. Remember, you can always add, but you can’t take away.

    Serums 

    I tend to find that products such as serums are easier to gauge because the majority of them come with a pump. The thought process here is 1 pump per application. Simple. But for argument sake, your looking for a 20p piece size.

    Moisturiser

    This will depend on the consistency, but as a rule, 20p piece size should suffice.

    Night cream

    Here you can afford to be a little more generous. Your skin does most of its regenerating work and moisture absorption while we sleep, so make sure to pack in the hydrating products now. I’d say a grape size amount will be more than enough here.

    Seems simple, but so many of us get it wrong. Remember though, everyone’s skin is different. If your skin feels like it needs a bit more, then listen. It’s asking you for a reason.

  • How to use your straighteners like a pro

    Despite commonly being referred to as ‘hair straighteners’, this holy grail hair tool has so many more uses and can help you create countless styles. Let me talk you through 3 of my favourites.

    tongs

    Beach Waves 

    Step 1: Prep your hair using L’Oreal Professional Pli, which will work alongside your straighteners to help give your style longevity.

    Step 2: Starting at the nape of the head, take a small horizontal section and place your straighteners facing downwards at the root.

    Step 3: Close the plates and rotate half a turn towards the back of the head and run the straightener through the hair.

    Step 4: Repeat the technique through the head, alternating the direction of the curl by rotating the straighteners in the opposite direction each time for a more "un-done" effect.

    Step 5: Once all the hair is styled, dress the hair by gently running your fingers through the waves.

    Glam Curls

    Step 1: Starting at the back of the head, take an angled section from the top of the ear to the nape. Place your straightener at the root following the angle of the section, close the plates and rotate half a turn towards the head.

    Step 2: Glide the straighteners towards the ends, keeping them angled downwards.

    Step 3: Repeat steps to complete back section working upwards to the crown - make sure that when styling both sides, the angle is in towards the nape.

    Step 4: Repeat the same technique on the sides, keeping the same angle as the back.

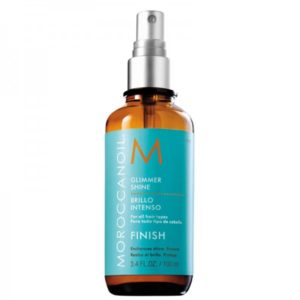
    moil-glimmer-shine-spray-10Step 5: When you have reached the top, comb back your hair to reveal your natural parting and repeat the technique. Dress using a dressing brush and a shine spray, such as MoroccanOil Glimmer Shine Spray.

    Loose Waves

    Step 1: Take a small section at the front of the hair, mist with Redken Iron Shape to protect the hair and hold the curl.

    Step 2: Bend the hair to form an S shape. Place the hair between the plates and lightly clamp the hair to set the wave.

    Step 3: Continue feeding the hair through the straighteners, bending the hair into S shapes. Leave the ends out to give the look a more casual finish.

    Step 4: To dress the hair, tilt the head back and lightly massage at the roots with the pads of your fingers to break up the waves and create a boho finish. Finish with Catwalk Work It Hairspray.

  • How to: Create the ‘Undone’ Volume Look

    Undone volume. It’s one of those styles that everyone lusts after, but so few feel confident they can achieve without the help of their stylist. It’s the celebrity go to look and as a result has become one of the most requested blow-dry looks ever. But trust me ladies, the beauty of this style is that it’s meant to look messy and scream ‘I just woke up like this’ (yeah right). With just a few hints and tips from a pro, you can achieve this look at home and have everyone thinking you’ve got one hell of a loyalty card at the salon.

    urban_woman

    Step 1: Root lift

    Apply a root lift spray, such as L’Oreal Professionnel Volumetry Anti-Gravity Volume Root Spray 125ml then, using your hairdryer without the nozzle, start to dry with your fingers, lifting the hair and directing the airflow into the root area.

    Step 2: Curl up

    Pop your hairdryer nozzle back on and grab a Moroccanoil Ceramic Barrel Brush (or similar) and direct the airflow from the roots to ends. Roll the hair around the brush back towards the heat, heating the hair as you roll. Now for the clever bit…ever wondered what that cold button on your dryer was for? Use it now to set the hair before unwrapping the hair, back-brushing lightly at the root and pinning into a barrel curl. That’s how the pro’s do it.

    Step 3: Pin curls

    Carry on section by section through your hair, remembering to take vertical sections and directing the heat away from the face. Repeat the previous step to complete the sides and back of the head, wrapping and pinning each section.

    Step 4: Get that lift

    Now you’ve reached the crown and the top start taking horizontal sections, elevating each section vertically and directing the nozzle into the root area for extra lift

    Step 5: Tease out

    Unpin each section and gently tease the hair at the root using a comb before spritzing with hairspray. I love Tigi Catwalk Session Series Finishing Hairspray. Shake the style out with your hands then use your fingers to dress it out to our desired finish.

    Simple right?! Give it a go and you’ll be amazed at the results.

    Xoxo

Items 1 to 3 of 47 total

  1. 1
  2. 2
  3. 3
  4. 4
  5. 5
  6. ...
  7. 16