.

01242 964 444  CONTACT US

0Item(s)

You have no items in your shopping bag.

Product was successfully added to your shopping cart.

Inspiration

  • Easy ways to style curly hair

    Curly hair…everyone wants it, unless they already have it. If you have curls naturally you know…curly hair comes with issues. Sure, it can hold style like nobody's business, but it's fragile in its own way. There's the obvious problems, such as curls tend to be on the dryer side and are prone to breakage. But some problems you wouldn’t know unless you were born with curls, like the fact that brushes are the enemy. Brushes will only ruin your bounce. 

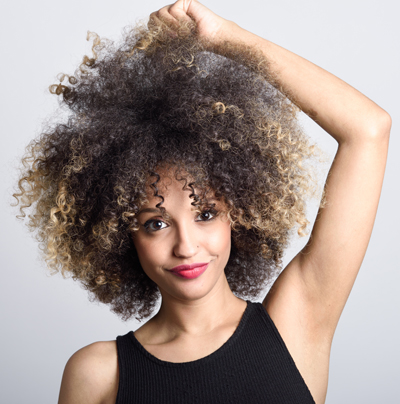
    So let me fill you in on the secrets behind styling your curls and help put those issues to bed. The basics of styling curly hair with minimal heat damage, involves three main styles: wet, natural and dry and roughly pulled back. Allow me to guide you through each style

    Style 1: Wet

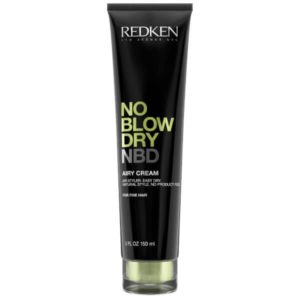
    Not really a style, mainly just a starting point. This is when product plays a key role to give you the foundation you need. For finer curls opt for a product that will give you some grip and hold, such as a mousse. I always recommend Kérastase Resistance Volumifique Mousse 150ml. If you find your curls are a little more coarse, you’ll need to layer a mousse over a moisturising cream when your hair is still holding water. Try Moroccanoil Intense Curl Cream 300ml. It will control your curl and stop any frizz in one step.

    Style 2: Diffused

    To dry your curls naturally, without too much styling, you need a low-heat, low-fan setting along with a diffuser attachment for your hairdryer. As you dry your curls with the diffuser twist your hair between your forefinger and thumb. By using this action on your hair cuticle you ensure your hair is fully dry. If your curls aren’t completely dry, they will change shape and change style throughout the day.

    Style 3: Roughly Pulled Back

    The other great thing about curly hair is that buns are easy and all you really need a hairband. Something about roughly pulled back curls makes it look like you’ve made an effort. Winner. Just make sure that when you pull your hair back, to keep it from feeling too ‘ready for the gym’, pull some strands out in the front for some curls to frame your face. In many cases, the best way to show off the amazing texture of curly hair is a simple ponytail with lots of volume in the back. Don’t be too precious about it though. Curly hair rarely stays where you put it for long. Sometimes it's best to just let it do it’s own thing. Afterall…you have the hair everyone wants.

    xoxo

  • Fake it till you make it

    Despite it being a pretty wet and miserable day as I write this post, the days have been getting a little warmer of late and soon it’ll be the time of year all girls dread…it’s time to get your legs out and sadly they haven’t seen daylight since last September. That’s right girls it’s pasty legs time, but fear not, I’m here to help…or rather, fake tan is.

    Now, don’t be scared. I know you fear the orange streaks and patchy tan mistakes of days gone by, but things are different now. Follow my step my step guide below and trust me…fake tan can be your friend again.

    TIP 1: Scrub up

    Say it with me now…exfoliate, exfoliate exfoliate. Exfoliating your body will remove dead skin cells and create a smooth and uniform surface on the skin for your tan to be applied to, which will help result in an even colour. You’ll want to make sure you stay clear of exfoliators that contain oils as these will create a barrier on the skin so are not really ideal for tanning. Make sure you pay special attention to your elbows, knees and ankle areas as this is wear rough and dry skin tends to build up. I always opt for Thalgo Descomask Body Scrub.

    TIP 2: Hair removal

    This is where timing is key. Any hair removal, whether it’s waxing or shaving should be carried out 24 hours before you tan. This ensures that the skin is calm and ready for tanning. Never, EVER try to wax after applying tan ladies as all you’ll do is remove every last bit of tan in that area. Not the best move.

    TIP 3: Moisturise

    On the day of your tan application, don’t moisturise your body, or wear deodorant or perfume. Again, the moisturiser acts as a barrier to the tan and will prevent an even application. By all means (and please do) moisturise the night before, just not on the day. More on that later.

    TIP 4: Showertime

    If you have a shower just before your tan application make sure you blast your skin with cold water before you get out. It might not be your favourite thing to do, but it will shrink all of your pores and therefore reduce the chance of them getting blocked

    TAN TIP 5: Aloe Vera

    Moisturise your hands, elbows, knees and feet as well as your nails with an aloe vera based moisturiser. Also, If you have blonde hair, add a light layer of moisturiser to your hairline and eyebrows to stop them from absorbing tan and changing colour.

    TAN TIP 6: Which brand?

    With fake tan you really get what you pay for and if you opt for a brand that specialises in tanning, then you’re sure to get better results. A no brainer really. I will always go for St. Tropez Self Tan Bronzing Mousse. It’s quick-drying, so easy to apply and best of all it’s what I call an intelligent tan – it matches your skin tones and reacts with your amino acids to develop into a shade that is reflective of you, i.e. no orange or luminous fake looking tans. Winner.

    TAN TIP 7: Application

    Always apply using an applicator mitt. Pump your product onto the mitt and apply to the skin using sweeping motions, rather than circular motions - remember you want to evenly distribute the product. Make sure you start at the ankles and work your way up. When it comes to your back, flip the mitt back to front, you’ll find it easier to apply.

    TAN TIP 8: Face time

    When it comes to your face, the best tip I ever received is to mix the self tan with a small amount of moisturiser. This softens the formula to minimise the chance of breakouts.

    One last tip – make sure to apply moisturiser to your hands before you start to stop you getting orange palms…never a good look.

    Happy tanning! Feel free to share any of your own tips below.

    xoxo

  • Can’t stand the heat?

    With the summer months approaching, it can’t just be me who always looks to change up the way I style my hair. I’m not sure what it is about summer, but I always feel the need to tone down my beauty routine and take it back to basics. I opt for a CC or BB cream instead of my usual foundation, I’ll make sure to moisturise my body for a change and I always try to give my hair a break from the constant styling and heat that I expose it to daily. That said, I still want to look good and feel put together, not just like I’ve made no effort at all. If I’m honest though, I usually cave and go back to my heated styling tools after a day as my hair just won’t air-dry without making me look like I’ve been dragged through a hedge. This year things are different though as I’ve got a secret weapon. Enter Redken’s new No Blow Dry Stylers. 

    Whether you just don’t have enough time or energy to heat style your hair, or like me you want to take a break, Redken’s No Blowdry Stylers offer the ability to achieve a frizz-controlled style on the go. Like me you might be feeling a bit sceptical and swear you’ve heard this all before, but what makes Redken No Blow Dry different from other leave-in’s is Redken’s Air-Tex Technology; a system of flexible polymers for control and movement and quick dry polymers that help speed up drying time. The range consists of three creams, Airy Cream for fine hair, Just Right Cream for medium hair and Bossy Cream for coarse hair types, so there really is a version for everyone. Redken’s No Blow Dry creates an effortless style which both look great and feels great, plus it smells amazing and keeps that ‘just washed’ hair smell going for longer. I’m sold.

    The secret with these products is to know how best to use them to help you create your ideal no heat styler. Here’s a few of my tips and tricks to help:

    1. For loose beach waves

    Apply No Blow Dry to damp hair. Create one loose braid and let your hair air-dry. Undo braid, and shake out hair to perfectly waved tendrils.

    1. For tighter beach waves

    Apply No Blow Dry then create two or more braids, depending on your hair thickness. Let your hair air-dry, then undo braids and shake out.

    1. For a soft, face-framing bend

    Apply No Blow Dry then clip your hair behind your ears and allow it to air-dry. Unclip, then gently tousle.

    1. For bouncy waves with root volume

    Apply No Blow Dry then twist hair into a high topknot, and allow to air-dry. Undo the topknot and gently brush through.

    1. For enhanced natural texture

    Apply No Blow Dry then scrunch hair and allow it to air-dry.

    1. For defined natural curls

    Apply No Blow Dry then gently twist curls into shape using fingers and allow to air-dry.

    Have you tried the new #NBD stylers yet? I’d love to hear your tips on how best to use them. Get sharing!

    xoxo

Items 1 to 3 of 46 total

  1. 1
  2. 2
  3. 3
  4. 4
  5. 5
  6. ...
  7. 16